It’s the roller rink nightmare you’ve probably lived through. You’re in a long line, a human chain of skates and bad decisions, moving in unison around the wooden floor. Everyone keeps pace. It works. Until someone at the front panics and slams on the brakes without warning. The momentum behind them doesn’t care about their sudden stop. Everyone behind crashes into the person in front. It’s a chaotic, expensive pileup that ruins everyone’s night.
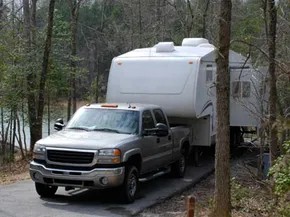
Driving a truck with a heavy trailer is mechanically similar. You’re moving a lot of mass. If you hit the pedal in your cab, the trailer doesn’t just magically stop. The inertia from tons of cargo wants to keep moving forward. Without a coordinated braking system, your truck stops, and your trailer keeps going. Then you’re not just dealing with a fender bender. You’re dealing with jackknifing, shattered glass, and a very angry insurance adjuster.
To prevent the kinetic equivalent of a roller rink disaster, most states mandate more than just a hitch. You need brakes on the trailer. But even more importantly, you need a brake controller in your tow vehicle. This device acts as the communication line between your foot and the trailer’s brake calipers. When you press the brake pedal, the controller sends a signal. It tells the trailer exactly how much stopping power it needs to match your deceleration. No surprise stops. No pileups.
But how does this electrical handshake actually work? There are different technologies on the market, each with its own logic for distributing power. Some rely on simple timing. Others use sensors to measure G-forces. Some are digital, some are analog. The installation process varies from “plug and play” to “call a professional.”
Let’s look at the specific types of brake controllers available and figure out which one fits your setup.
Types of Brake Controllers
Brake controllers fall into two distinct camps. You’ve got the proportional units and the time-delayed models. They work differently. They feel different. And they impact your rig’s stopping performance in very specific ways.
How Proportional Brake Controllers Work
Proportional brake controllers are the precision instruments of towing. They use a motion-sensing device to gauge deceleration rates. Think of it this way: when you hit the pedal, the controller measures how hard and fast the tow vehicle is slowing down. It then applies a matching amount of braking power to the trailer.
If you brake gently for a red light, the trailer slows down with equal grace. If you need to stop quickly for a squirrel jumping into the road, the trailer bites down immediately. The goal is synchronization. Heavy braking triggers the trailer to stop at the exact same moment as the truck.
This simultaneous action is why they are considered the smoothest option. Both sets of brakes share the workload evenly. Less strain on the tow vehicle’s brakes means less wear overall. It’s cleaner engineering.
These units are often called pendulum brake controllers. The name comes from their internal mechanism. A physical pendulum acts as the motion sensor. You have to calibrate them before towing. Park on a level surface. Ensure the pendulum hangs straight down. At rest, it senses no motion and sends no signal to the trailer brakes.
When you accelerate, the pendulum swings back. When you brake, inertia sends it forward. The farther it swings, the more power is sent to the trailer’s magnets. It’s a direct mechanical translation of force.
The Time-Delayed Alternative
Time-delayed brake controllers operate on a different logic. They don’t care about deceleration rates. They deliver a pre-set amount of power to the trailer brakes the moment the pedal is pressed. The driver determines that output level based on trailer weight.
There is always a slight lag. Power doesn’t hit the trailer instantly. Instead, the unit waits a fraction of a second before engaging. Drivers can adjust this delay using a sync switch. Shorten the delay for lighter loads. Extend it if the trailer feels unresponsive.
The trade-off is wear. Because the trailer brakes engage independently of how hard the tow vehicle is braking, the systems don’t always work in harmony. This can lead to increased wear on the braking components of both the truck and the trailer.
But they aren’t without merit. They are generally less expensive to buy. Installation is straightforward. No complex calibration on level ground is required. For many casual towers, the simplicity outweighs the performance nuances.
Making the Choice
So which one do you need?
If you tow heavy loads frequently or drive in mountainous terrain, the proportional model’s precision pays off. It prevents jackknifing. It saves brake pads. It feels natural.
If you tow occasionally with lighter trailers and want a budget-friendly setup, the time-delayed unit gets the job done. Just be aware of the potential for increased brake wear over time.
Proportional controllers offer smoother stopping and reduced brake wear, while time-delayed units are cheaper and easier to install.
The technology has evolved, but the core distinction remains. Mechanical sensing versus timed delivery. One reacts to physics. The other follows a script.
Hooking up the wiring isn’t the finish line. You need proof the system works. You need to know exactly how much braking force is being applied. Or at least that the brakes on the trailer are engaged when they should be. Most modern controllers include a built-in monitor. These are usually mounted under the dash. Specifically near the driver’s right knee. Easy to glance at. Hard to miss.
The digital screen tells a story. It shows voltage flow from the unit to the trailer magnets. Press the pedal. Voltage rises. Power increases. The trailer brakes lock in with more force. Ease off the pedal. Voltage drops. The system responds to your foot, not just the switch. This real-time feedback is the only way to confirm proper connection. It flags electrical faults before they become safety hazards on a downhill grade.
Newer electronic controllers do more than just show a number. They offer continuous diagnostics. LCD screens provide specific warnings. They don’t just blink; they inform. Customization is standard now. You can likely change the display language. English, French, Spanish. Some units even let you pick the interface color. It’s about clarity. Quick reads at highway speeds.
Installing Brake Controllers
Proper installation matters as much as the monitoring itself. A poorly wired controller is just a paperweight during an emergency stop. The process starts with identification. Find a solid mounting point under the dashboard. Avoid moving parts. Keep it within reach. The unit must be level. If it’s tilted, the internal mechanism in older proportional models can misread the deceleration. Electronic units are less sensitive to angle, but still, keep it straight.
Wiring follows. You’ll need a direct connection to the vehicle’s battery. Not the fuse box alone. A dedicated circuit ensures consistent power. The brake signal wire taps into the master cylinder switch. This tells the controller when you’re hitting the brakes. The output wire runs to the trailer connector. Usually the blue wire in standard 7-way setups.
Grounding is non-negotiable. A bad ground causes flickering displays and erratic braking. Clean the paint off the metal frame. Use a star washer to bite into bare steel. Tighten it down. Check the connection. It should be solid.
Once wired, test the system. With the engine off, press the manual override lever. The trailer brakes should engage. If they don’t, check the fuse. Then power up the vehicle. Adjust the gain setting. Start low. Drive in a safe, empty lot. Apply the brakes gently. Increase the pressure. Listen for the trailer wheels locking up. Too much gain causes skidding. Too little means the car does all the work. Find the sweet spot. Then drive.
Mounting the Controller for Visibility
Skip the guesswork and mount the unit where you can actually see it. Most drivers tuck the brake controller under the dashboard, right above the right knee. It keeps the screen in your line of sight so you catch glitches before they become blowouts on the highway.
The Four-Wire Setup
Wiring isn’t rocket science. Most controllers use a standard four-wire configuration that plugs directly into the braking system. You’re looking at four distinct connections:
- Trailer feed – sends power straight to the trailer’s brakes
- Ground – connects the unit to a negative chassis ground
- Brake switch – triggers power flow the moment you hit the pedal
- Battery power – keeps the controller’s internal logic alive
DIY vs. Professional Help
If a tangle of colored wires makes your eyes cross, hand it off to a pro. But if you know your way around a multimeter and can follow the manufacturer’s schematic, you can do it yourself. Don’t overcomplicate it. Stick to the manual.
See Also
– How Cargo Carriers Work
– How Drawbar Pull Works
– How Breakaway Kits Work
– How Towing Steering Stabilizers Work
– How Fifth Wheel Hitches Work
– Top 10 Towing Risks to Keep in Mind
More Great Links
– etrailer.com
Sources
– Dyer, William. “Combination brake controller and monitor for an electrical braking system for trailers.” FreePatentsOnline.com. July 13, 1993.
– etrailer.com. “Trailer brake controller installation and types.”
– Southwest Wheel Company. “MaxBrake brake controller.” 2007.
– TrailerShopping.com. “Installing a brake control on a vehicle equipped with a factory towing package.” 2005.